
While I was working on my self-build NAS with Nas4Free as OS, I wondered how to attach a printer to it because my printer could only be connected by USB and I wanted to print from all my machines in my house.
From my old Linux machine I knew the CUPS printing server package. So I searched for a way to get it work with my Nas4Free installation. Because Nas4Free is build on a FreeBSD system I could easily get some information to make it work.
WARNING!: I’m not responsible for any damage or failures of your Nas4Free installation. Please take care of the side notes and ALWAYS! backup your Nas4Free configuration file (found at System tab -> Backup/Restore) before doing any of the following steps.
First of all I have to say that I was doing this on a Nas4Free FULL installation not EMBEDDED! If you have the embedded version you may consider changing to full version or find a way to convert the next steps. Also I don’t recommend doing this steps if your not comfortable with using a shell.
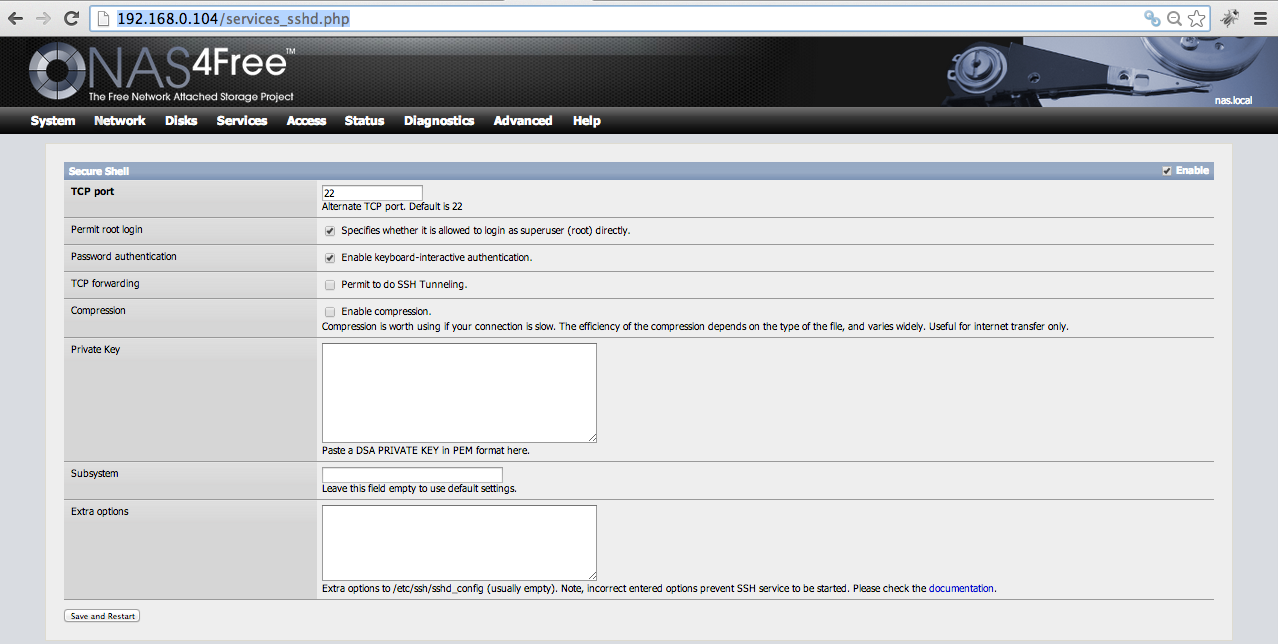
1. Enable SSH
You can enable SSH access by using your Nas4Free WebGUI. Log in as admin user and switch to Services -> SSH. Check or uncheck the boxes like in the picture below:
Then reboot your NAS and connect to your NAS as root via SSH by using PuTTY or any other program you comfortable with.
2. Download and install CUPS package
Use the following command to download and install the CUPS package:
pkg_add -r cups
3. Modify rc.conf file
Add the following lines to your rc.conf file found at /etc/rc.conf:
cupsd_enable="YES"
devfs_system_ruleset="system"
devfs_enable="YES"
4. Enable devfs
Create the devfs file via:
touch /etc/rc.d/devfs
Then add this to the previously created devfs file:
#!/bin/sh
#
# $FreeBSD$
#

# PROVIDE: devfs
# REQUIRE: mountcritremote
# BEFORE:  SERVERS securelevel
# KEYWORD: nojail

. /etc/rc.subr

name="devfs"
start_cmd='devfs_start'
stop_cmd=':'

devfs_start()
{
        if [ -n "$devfs_system_ruleset" -o -n "$devfs_set_rulesets" ] ||
            checkyesno devfs_load_rulesets; then
                devfs_init_rulesets
                if [ -n "$devfs_system_ruleset" ]; then
                        devfs_set_ruleset $devfs_system_ruleset /dev
                        devfs_apply_ruleset $devfs_system_ruleset /dev
                fi
                if [ -n "$devfs_set_rulesets" ]; then
                        local _dir_set
                        local _dir
                        local _set
                        for _dir_set in $devfs_set_rulesets; do
                                _dir=${_dir_set%=*}
                                _set=${_dir_set#*=}
                                devfs_set_ruleset $_set $_dir
                                devfs_apply_ruleset $_set $_dir
                        done
                fi
        fi
        read_devfs_conf
}

read_devfs_conf()
{
        if [ -r /etc/devfs.conf ]; then
                cd /dev
                while read action devicelist parameter; do
                        case "${action}" in
                        l*)     for device in ${devicelist}; do
                                        if [ ! -e ${parameter} ]; then
                                                ln -fs ${device}
${parameter}
                                        fi
                                done
                                ;;
                        o*)     for device in ${devicelist}; do
                                        if [ -c ${device} ]; then
                                                chown ${parameter}
${device}
                                        fi
                                done
                                ;;
                        p*)     for device in ${devicelist}; do
                                        if [ -c ${device} ]; then
                                                chmod ${parameter}
${device}
                                        fi
                                done
                                ;;
                        esac
                done < /etc/devfs.conf
        fi
}

load_rc_config $name
run_rc_command "$1"
5. Modify devfs.rules
Again create a devfs.rules file via:
touch /etc/devfs.rules
Then add those lines to it:
[system=10]
add path 'unlpt*' mode 0660 group wheel
add path 'ulpt*' mode 0660 group wheel
add path 'lpt*' mode 0660 group wheel
add path 'usb*' mode 0770 group wheel
add path 'usb/X.Y.*' mode 0660 group wheel
ATTENTION!: Notice the last line where it says „usb/X.Y.*“. This must be edited to your needs. If you are using a USB printer with FreeBSD 8.0 or later, you will need to find the proper /dev/usb/* device pointed at by the /dev/ugen*. To do that connect your printer to your NAS and turn it on. After that type „dmesg“ in your SSH console and find some lines where it says something about your printer like here:
ugen3.2:  at usbus3
ulpt0:  on usbus3
ulpt0: using bi-directional mode
Here your printer would be connected via „usb/3.2.*“
6. Modify cupsd.conf
Modify your cupsd.conf file found at /usr/local/etc/cups/cupsd.conf. Find the following lines and add or modify all missing lines:
# Disable SSL for admin pages
DefaultEncryption Never

# Only listen for connections from the local machine.
Listen YOUR_NAS_IP_ADDRESS:631
Listen /var/run/cups.sock

# Restrict access to the server...

  Order allow,deny
  Allow 192.168.0.*

# Restrict access to the admin pages...

  Order allow,deny
  Allow 192.168.0.*

# Restrict access to configuration files...

  AuthType Default
  Require user @SYSTEM
  Order allow,deny
  Allow 192.168.0.*
ATTENTION!: Notice the lines where it says „192.168.0.*“ if your local network is using another IP address you have to modify it to your needs.
7. Restart all services
Insert the following commands to your SSH console to restart the services:
/etc/rc.d/devfs restart
/usr/local/etc/rc.d/cupsd restart
After that you are ready to go with your fully setup CUPS print server. Just connect to it from a browser in your local network via IP_ADDRESS_TO_YOUR_NAS:631
I hope you can now print from all your local machines via your NAS. Feel free to comment and consider sharing this solution!
Thanks for that, very helpful.
Might also bear in mind that you may need to install gutenprint for extra printer drivers.
Thanks for the hint. I have to say I did install the gutenprint driver package afterwards, but forgot to mention it here 😛
Followed your directions and I am running into an issue. On the printer administration page I cannot do a single thing. No button works and any options I change do not save when I click the „change settings“ button. I also get a lot of „Warning: program compiled against libxml 208 using older 207“ on startup, could that be part of the issue?
It looks like your CUPS version was compiled with libxml version 208 and youre using 207. Maybe try updating libxml? Do you have the latest NAS4Free installed (atm 9.1.0.1.847)?